
I almost had my daughter convinced that she should be a witch for Halloween this year. With baby #3 due anytime, I'm not sure I'll even feel up to trick or treating. We have all the supplies at home for a witch costume. We went to the store to buy a child's size witch hat and that's where my plan unraveled. My daughter saw her dream costume hanging from a display rack. Three guesses you can get it right. Yep...Elsa. Of course the store didn't have her size and all online searches were fruitless (either they were out too or wanted a small fortune for it). Finally, I said to myself "it can't be that hard" and off to the fabric store I went for inspiration!
Now, I am not a clothing sewer. So Elsa's dress is my own take on the amount of the work I wanted to put into a costume that will be worn for one night and then stuffed into the dress up box for ocassional use. I also had to keep in mind that it's pretty cold where I live on Halloween, so I had to think about layering and coats. Finally, I tried to use some things that I already had at home.
So here it is:
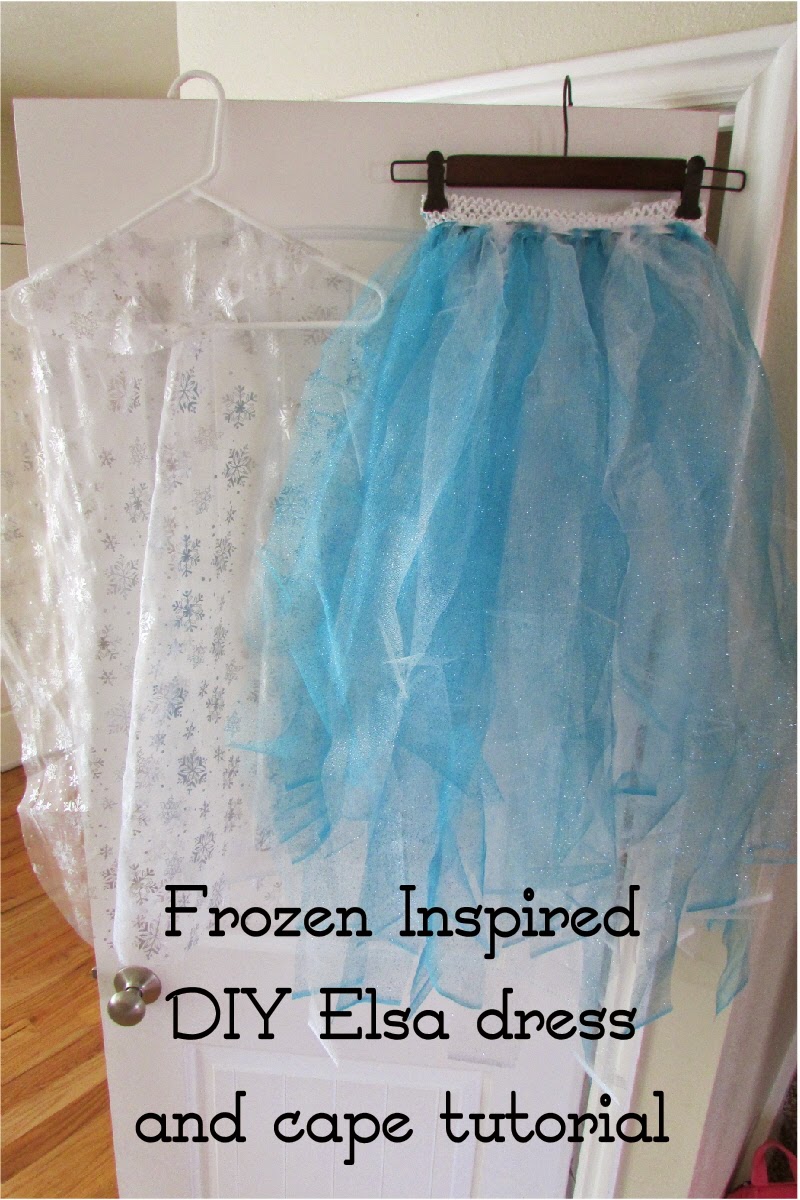
I used a white shirt my daughter already had for the top of the dress. Underneath the skirt, she'll wear a pair of thick white leggings I found, but really on Halloween night she'll probably be wearing snowpants under it. At the fabric store, I bought 2 yards each of white and blue tulle (the kind my daughter picked out had glitter in it). Then we got a yard of the sheer fabric for the cape. A visit to the dollar store and we found the crown to match. I used some leftover elastic I already had and I was good to go!


I cut my tulle in 3 inch wide strips.


I used this tutorial from Make It-Love It to the make the cape. It was great! The only thing I changed was I didn't add a train. Since this was for trick or treating I didn't want her to trip on it or anyone else to step on it.


Pointers for the olaf costume:
- The tutorial says to use fleece, but I had white flannel on hand, so that is what all 3 pieces are made out of. I used felt for the buttons, teeth, nose, eyes, eyebrows, and hair twigs.
- I hot glued the eyes and eyebrows on the hat and the buttons on the shirt to save time and effort instead of hand stitching.
- The nose is two pieces of orange felt measured 3.5 wide and 4 inches tall. It took me a couple tries to get the shape just right (it's not a triangle...more like a rocket shape!). I used my machine to sew it together (leave an opening) and then turned in rightside out, stuffed it, and then hand sewed it on the hat.
- I just did a front band on my hat (I still am not sure what the back band in the tutorial is for, although if you wanted a snug fit, I was thinking you could easily do a band around the back with an elastic).
- For my front band: I measured 2 strips of fabric the same width as my hat. They were about 2 to 2.5 inches wide. Then I cut the two strips so they were rounded more like a baseball cap (or newsboys cap). Leaving a space for the teeth, I used the machine to sew the two pieces together, flipped them rightside out, ironed the crease, and then sewed it to the front of the hat. Then, I added the teeth in the space I had left open.


Happy Halloween!

